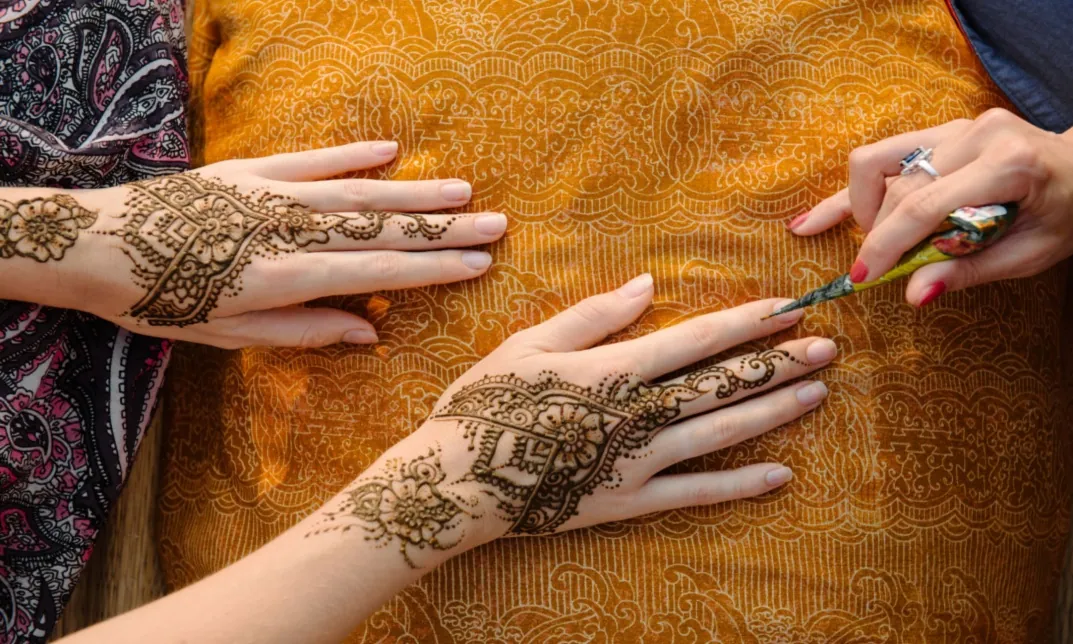
Making fresh henna paste is not about adding more ingredients. It is about using the right ones and giving the dye time to wake up. The steps for preparing a natural henna paste are simple: choose fresh body art quality henna powder, mix it with water, sugar and safe essential oil, then let it rest for dye release. After that, test the colour, adjust the texture and fill your cones. This guide follows one clear method: mix small, release right and stain smart. So, you can avoid waste, control the paste better and get a deeper natural stain with more confidence.
Now, let’s dive in and explore each step clearly.
What are the Steps for Preparing a Natural Henna Paste?
The steps for preparing a natural henna paste are simple and rewarding. Choose fresh body art quality (BAQ) henna powder. Mix it with sugar, purified water, and safe essential oil. Let it rest for dye release, which is the chemical transition that allows the dye to bond with the skin. Then test it, adjust the texture to your preference, fill your cones and store any extra paste safely in the freezer.
Quick process:
- Choose BAQ henna powder.
- Measure your ingredients accurately.
- Mix henna powder and sugar together.
- Add water slowly to avoid lumps.
- Add essential oil to deepen the stain.
- Cover and rest the paste.
- Test dye release with a spot test.
- Adjust the texture for smooth flow.
- Fill your applicator cones.
- Use the paste fresh or freeze for later.
Recipe Amounts
|
Batch Size |
Henna Powder |
Sugar |
Essential Oil |
Liquid |
|
Small beginner batch |
25g |
13g |
7.5ml |
About 1/4 cup |
|
Larger batch |
100g |
1/4 cup |
2 tbsp |
About 3/4 cup |
Why Should Beginners Mix Small First?
When you are first learning the steps for preparing a natural henna paste at home, the temptation is to make a massive bowl of paste. However, mixing small is the smartest move for a novice. Small batches help beginners learn the nuances of the paste much faster than large batches.
Small batches cost less. If you accidentally add too much water or choose a low-quality oil, you only lose a small amount of powder rather than a full 100g bag. Small batches are also significantly easier to fix. If the texture isn’t quite right, you can adjust it with tiny pinches of powder or drops of water without the mix becoming unmanageable.
By working with 25g of powder, you learn your preferred texture. Some artists like a “stringy” paste, while others prefer it “creamy.” Mixing small allows you to experiment with these textures. You avoid wasting a full 100g batch while you are still figuring out how your specific climate affects the drying time. The biggest benefit is that you can learn by testing, not guessing.
What Makes Natural Henna Paste Work?
Natural henna paste works because henna leaves contain lawsone, a natural tannin dye. Once the leaves become powder and meet liquid, the natural dye starts to come out. A water-based liquid helps release that dye from the powder by breaking down the plant cell walls.
The surrounding conditions can change the whole result. What happens around the mix matters more than people think. Warmth changes how fast dye release happens; the warmer the room, the faster the molecules mobilise. Conversely, cold rooms slow things down significantly. Fresh paste stains better because the active dye is at its peak strength. If the paste sits out too long after release, the dye “demises” and loses its ability to stain the skin.
Tested beginner method:
This guide follows a small-batch method. It focuses on careful measuring, dye-release testing, and safe storage. By understanding that lawsone gives henna its stain and that water or lemon juice starts the release, you can control the outcome of your art.
Which Henna Powder Should You Use for Skin?
Use fresh body art quality (BAQ) henna powder for skin designs. There is a massive difference between the henna sold in grocery stores for hair and the henna used by professional artists. BAQ henna is usually finer than hair henna because it has been sifted multiple times through fine mesh. This ensures it flows better through the tiny opening of a henna cone without clogging.
Buy from a supplier that clearly lists the powder as body art quality henna. Avoid powder that only says “natural henna” without saying it is suitable for body art. Often, “natural henna” sold for hair contains metallic salts or larger plant fibres that make it impossible to use for intricate skin designs.
- Choose fresh powder (it should look bright green, not brown).
- Choose finely sifted powder for a smooth experience.
- Avoid dull brown or grey powder, as this indicates it is old.
- Avoid hair henna for skin designs to prevent frustration.
- Use trusted suppliers from the henna community.
Rajasthani henna often works well for flowing, stringy lines, which is perfect for traditional Indian patterns. Jamila henna, a popular Pakistani variety, is known for being very creamy and works well for dots and thicker design parts.
What Ingredients Do You Need for Natural Henna Paste?
Natural henna paste needs henna powder, a water-based liquid, sugar, and safe essential oil. Each one has a clear job in the chemical and physical makeup of the paste.
- Henna powder: This is the foundation and gives the stain.
- Water: This starts the dye release process.
- Lemon juice: This can be used instead of water to slow down dye release, which is helpful in very hot climates.
- Sugar: This acts as a humectant. It keeps the paste moist on the skin so it doesn’t crack and fall off too quickly.
- Essential oil: These contain terpenes (“terps”) that help the lawsone dye penetrate deeper into the skin layers.
Tea tree, cajeput, lavender, and eucalyptus are common choices for essential oils. Use skin-safe essential oils only. Do not use fragrance oil. Fragrance oils are synthetic and do not help the stain; in fact, they can cause severe skin irritation.
Which Liquid Is Best for Beginner Henna Paste?
Purified water is the easiest choice for beginners. It gives a simple mix and faster dye release, usually within 6 to 12 hours. While lemon juice is a classic ingredient, it is highly acidic. This slows the process down and can sometimes irritate sensitive skin.
- Choose water for a faster beginner mix and a creamier texture.
- Pick lemon juice when you want slower dye release or work in a very warm room.
- Try water and lemon together if you want a middle option.
- Keep oil out of the main mix, as it can block proper dye release.
The interesting thing is that lemon juice can slow dye release, even though many beginners expect faster results. Water is almost always the better choice for your first few batches.
Which Tools Make Henna Paste Easier?
The right tools make the paste smoother, cleaner, and easier to control. You do not need expensive equipment, but specific household items make the steps for preparing a natural henna paste much easier.
- Glass or stainless steel bowl: Avoid plastic, as henna can stain it permanently.
- Spoon or spatula: A silicone spatula is great for scraping the sides of the bowl.
- Digital scale: This is essential for the “Mix Small” philosophy.
- Cling film or lid: To prevent the paste from drying out during the resting phase.
- Transfer bag: A carrot bag or a sturdy freezer bag to move paste into cones.
- Henna cones: Pre-rolled or hand-rolled cellophane cones.
- Nylon stocking: Used for straining the paste to ensure zero clogs.
A digital scale is best because it helps you measure the small batch properly. Measuring by volume (spoons) is often inaccurate because henna powder density varies.
How Do You Mix Natural Henna Paste Step by Step?
Mixing henna is a therapeutic process. If you follow these formula, you will create a paste that is easy to pipe and leaves a beautiful stain.
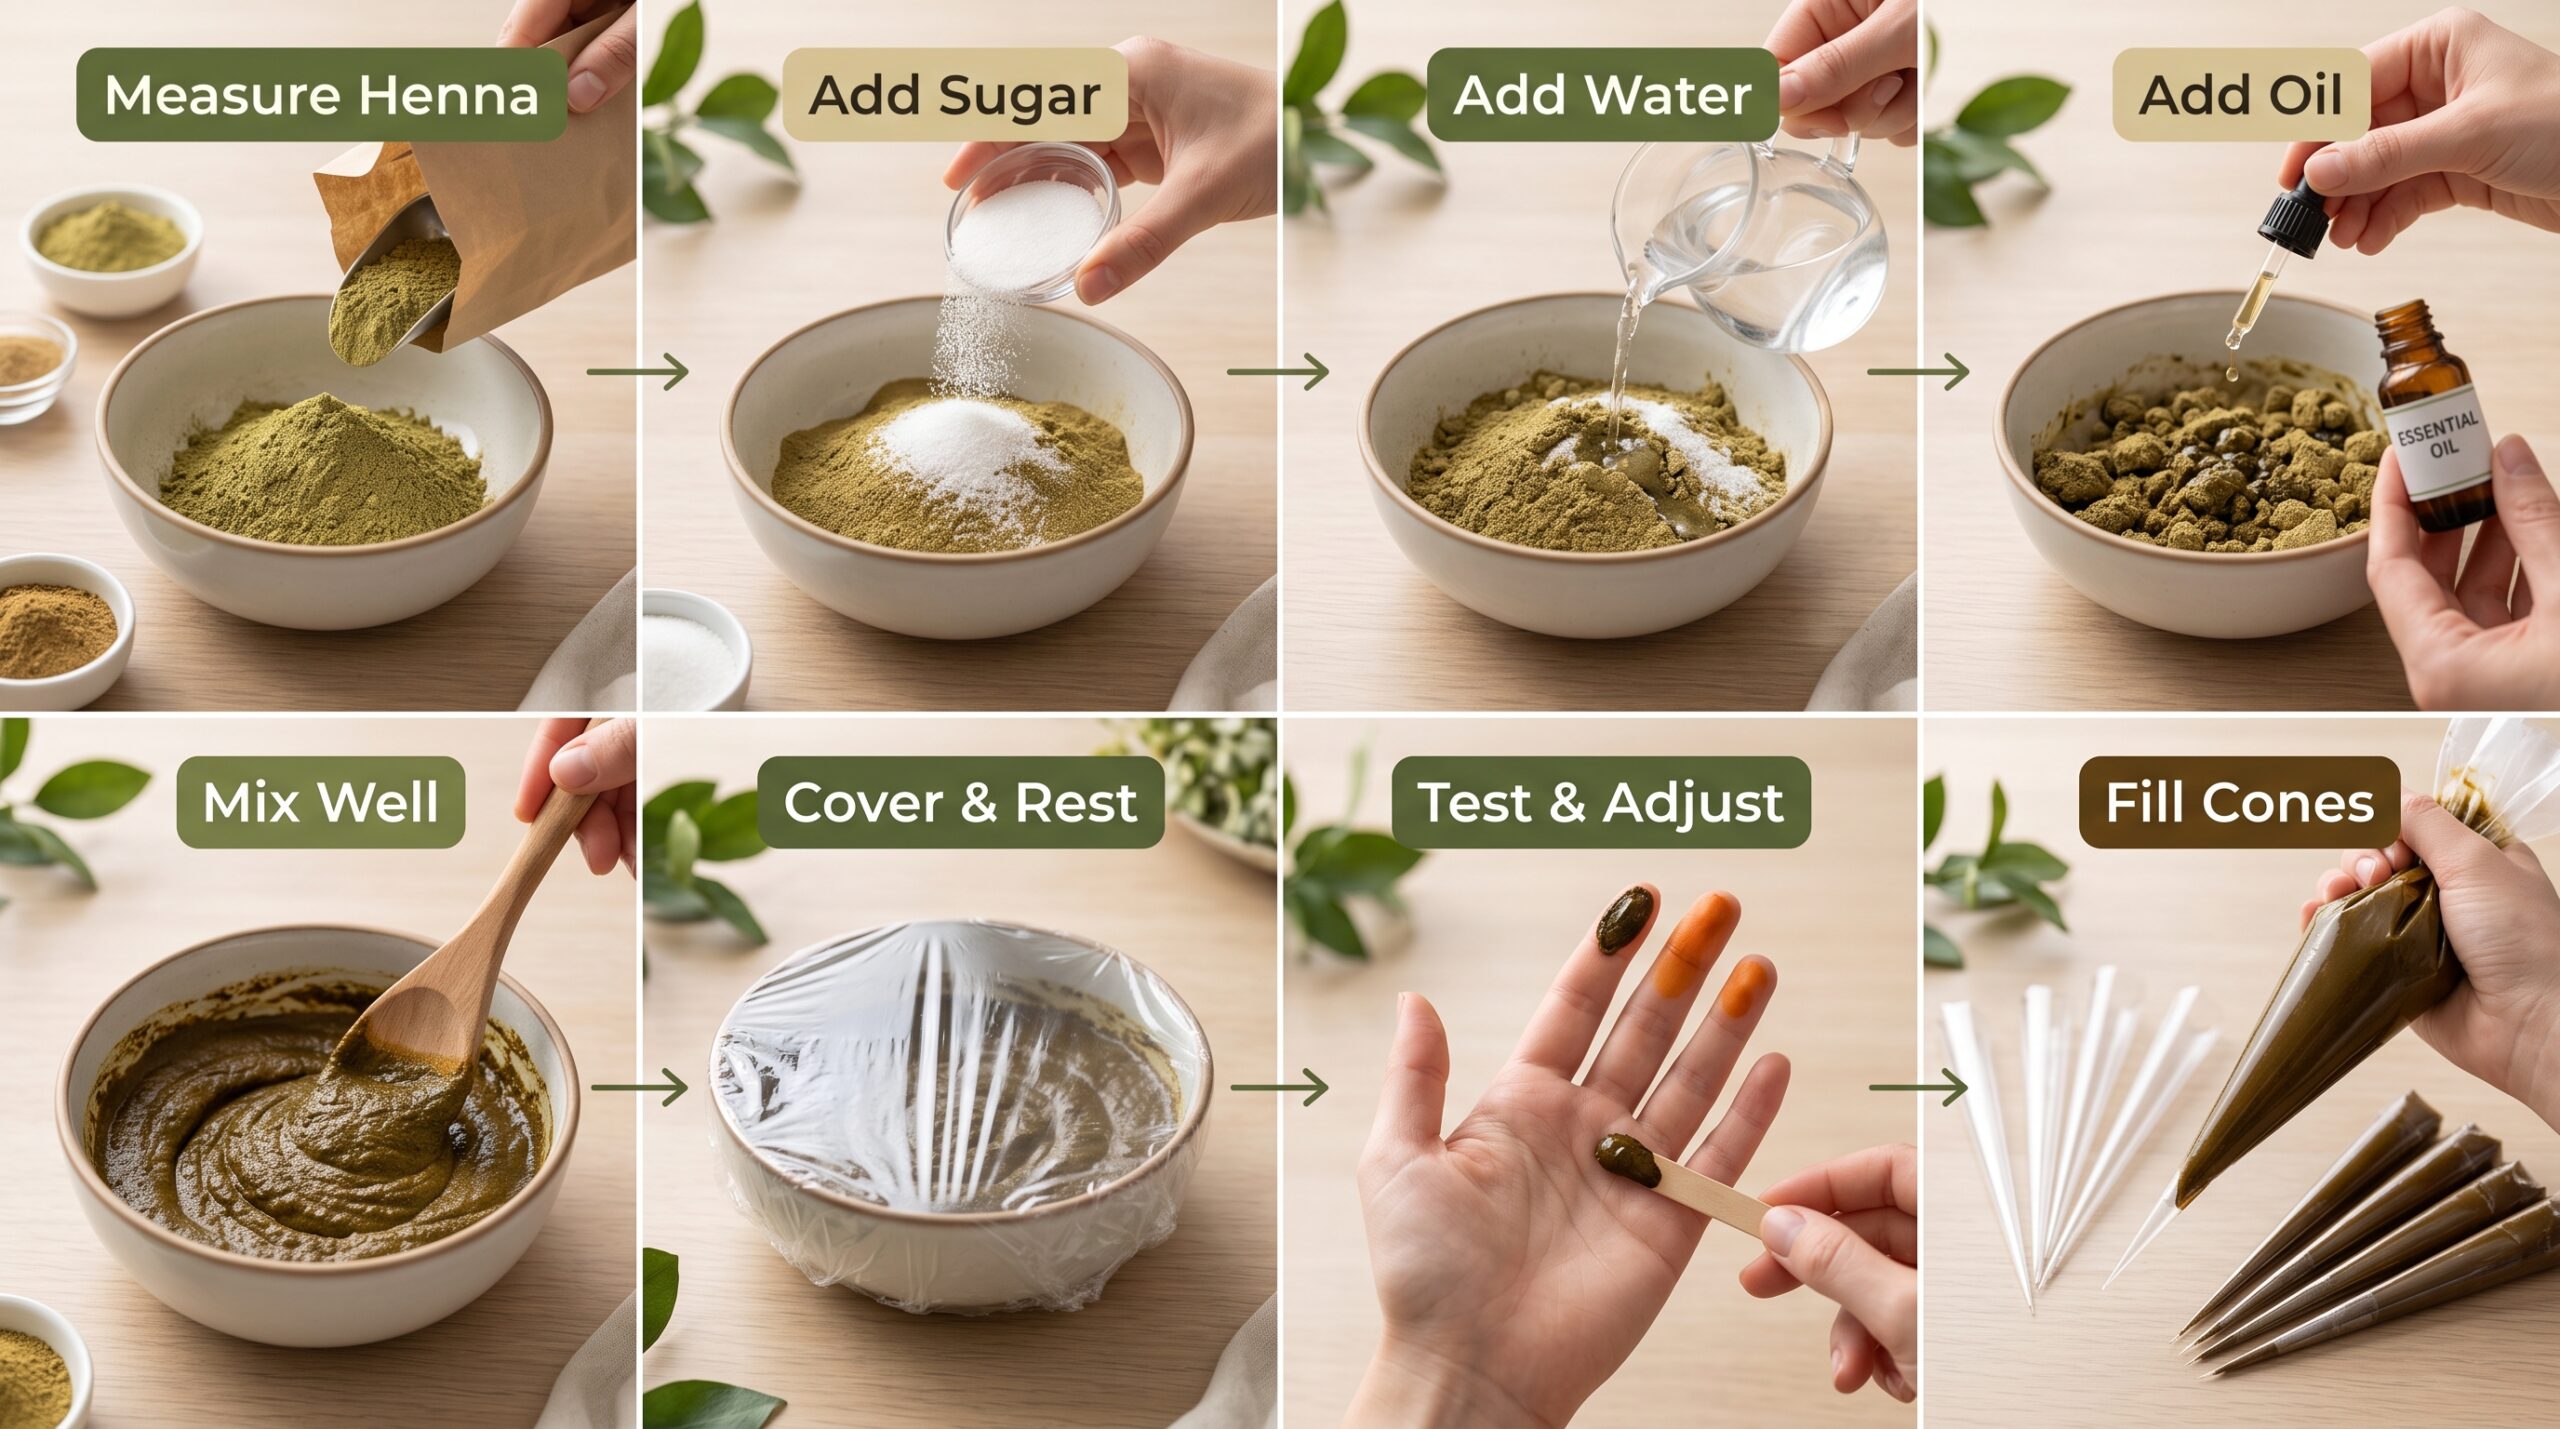
Mix henna powder and sugar first. Then add water slowly until the paste becomes thick. Add essential oil and stir well. Cover the bowl and let the paste rest. After dye release, test it, adjust the texture, and fill your cones.
Step 1: Measure the henna powder
Use 25g for a small beginner batch. Place your bowl on the digital scale, tare it, and carefully weigh out the powder.
Step 2: Add sugar
Mix the sugar with the dry henna powder. Sugar helps the henna stick to the skin. In dry climates, you might need a little more sugar; in humid climates, a little less.
Step 3: Add water slowly
Add a little water at a time. Mix thoroughly after each small pour. You are looking for a “thick mashed potato” consistency at this stage. Do not make it too thin yet.
Step 4: Add essential oil
Use a skin-safe oil like lavender or tea tree. Keep it simple. The oil will help the dye molecules bond to the skin for a darker, longer-lasting stain.
Step 5: Mix until thick
Spend a few minutes beating the paste with your spoon. This helps break up any small lumps of dry powder.
Step 6: Cover and rest
Cover the paste with cling film, pressing the film down so it touches the surface of the paste. This prevents a “skin” from forming.
Step 7: Test and adjust
Once the time has passed, check for dye release. If it passes the spot test, add tiny drops of water until it reaches a “melted chocolate” or “toothpaste” consistency.
Step 8: Fill cones
Use a transfer bag to squeeze the paste into your cones. This keeps the process clean and professional.
How Long Should Henna Paste Rest for Dye Release?
Henna paste needs resting time before it stains well. This is the “Release Right” part of the process. If you use it too early, the stain will be faint. If you wait too long, the dye will expire.
- Rajasthani henna with water: Usually 6 to 12 hours.
- Rajasthani henna with lemon juice: Usually 12 to 24 hours.
- Jamila henna with water: Usually 12 to 24 hours.
- Jamila henna with lemon juice: Usually 24 to 48 hours.
A warm room helps dye release faster. If your house is cold (below 20°C), you may need to find a warm spot, like the top of the refrigerator, to help the process along.
How Can You Tell Henna Paste Is Ready?
Henna paste is ready when it leaves a bright orange mark after a short spot test. This is the most reliable way to know if the lawsone has been released.
Dab a little paste on your fingertip or palm. Leave it for about one minute. Wipe it away in natural light.
- Bright orange: The paste is ready to be used or frozen.
- Pale yellow: The paste needs more time to rest.
- Weak/No colour: The powder might be old, or the room is too cold.
- Strong chemical smell: This is a warning sign that the powder or oil is not natural.
How Do You Fix Henna Paste Texture?
Good henna paste should feel smooth and easy to control. It should flow through the cone with minimal pressure, but it should not run or bleed across the skin.
- Too thick? Add 1 teaspoon of water and stir until the mix feels smooth.
- Too thin? Add a small pinch of henna powder and let it sit for 30 minutes.
- Too lumpy? Mix vigorously with a spatula or use the nylon stocking straining method.
- Does the cone keep clogging? This means there are fibres in the mix. You must strain the paste through a nylon stocking.
- Paste dries too fast? Add slightly more sugar to your next batch to help it stay tacky.
- Does paste feel sticky? You likely used too much sugar. Use less next time.
The challenge is that weather changes the paste texture. Dry air may need more sugar to keep the paste from flaking, while humid weather may require a stiffer mix.
Should You Sift or Strain Henna Paste?
Sifting helps if the powder feels gritty right out of the bag. Straining helps if the finished paste has lumps that clog your cones. Body art quality powder is usually pre-sifted, so you might be able to skip the dry sifting.
- Sift gritty powder before adding liquids.
- Strain lumpy paste through a nylon stocking into a second bowl.
- Use a stocking for the smoothest possible cone flow, especially for intricate bridal designs.
- Skip extra sifting if the powder already feels silky and fine between your fingers.
What Mistakes Should Beginners Avoid?
Most beginner problems come from poor powder, too much liquid, or rushed dye release. Natural henna paste works best when the recipe stays simple.
- Do not let coconut oil or olive oil become the main liquid in the paste.
- Skip hair henna if you want paste for skin designs.
- Stay away from “black henna” cones from unknown sources.
- Never add random fragrance oils or perfumes.
- Add liquid slowly, as you cannot easily take it out.
- Always do a spot test before filling your cones.
- Use fresh paste soon, instead of leaving it out for more than 24 hours.
- Store your powder well, and avoid old powder in a warm cupboard.
The honest truth is that most failed pastes come from rushing, not from the recipe. Patience is the most important ingredient.
Is Natural Henna Paste Safe for Skin?
Natural henna usually stains orange, then matures to a brown or reddish-brown. It should never stain jet black within minutes. Black henna is not henna at all; it often contains PPD (para-phenylenediamine), a harsh dye chemical that may leave scars and trigger serious skin allergies.
- Stay away from any product labelled “black henna”.
- Check the smell before use. A strong chemical or petrol-like smell is a warning sign.
- Always do a patch test on a small area of skin before full use.
- Keep henna away from broken, sore, or irritated skin.
- Avoid using strong “terp” oils like tea tree on children or people with very sensitive skin.
For more information on the dangers of chemical henna, [link to a trusted safety source like the Henna Society].
Can You Use the Same Henna Paste for Hair and Body Art?
Body art henna paste and hair henna paste are not always the same. Body art paste is specifically formulated with sugar for stickiness and essential oils for skin penetration.
Hair paste usually omits the essential oils to avoid scalp irritation and skips the sugar because it is not needed for the paste to stay on the hair. Do not use a strong body-art paste on your scalp without checking the ingredients, as the high concentration of essential oils might cause a burning sensation.
How Do You Store Fresh Henna Paste?
Fresh henna paste works best soon after dye release. At room temperature, the dye will eventually “demise” and lose its staining power. To keep your paste fresh for weeks or even months, you must use the freezer.
- Store dry powder in an airtight container in a cool, dark place.
- Use fresh paste within 24 hours of dye release if kept at room temperature.
- Freeze filled cones in a sealed freezer bag.
- Label cones with the date and the type of henna used.
- Thaw cones at room temperature for 15-30 minutes before use.
- Do not microwave frozen cones. This will cook the henna and ruin the dye.
How Do You Make Henna Stain Darker After Application?
The final phase of our method is to “Stain Smart”. Henna stain gets darker when the paste stays on the skin long enough, dries slowly, and avoids water after removal.
- Keep the paste on the skin for 4 to 6 hours (or even overnight).
- Let the paste dry and flake off naturally.
- Scrape the paste off gently with a blunt edge or a fingernail; do not wash it off.
- Avoid water on the area for the first 24 hours after removal.
- Keep the area warm; body heat helps the dye oxidise.
- Avoid soap and aggressive scrubbing for the first few days.
- Let the stain mature; it will take 24 to 48 hours to reach its darkest brown.
The surprising part is that the stain is not finished when you remove the paste. It is a living process that keeps changing for the next day or two as it reacts with oxygen.
Final Thoughts on the Steps for Preparing a Natural Henna Paste
The steps for preparing a natural henna paste are easy when you keep the method simple and respect the science behind the plant. By focusing on “mix small”, you reduce the pressure of perfection. By “Releasing Right”, you ensure your hard work results in a vivid stain. Finally, by “Staining Smart”, you protect the art you’ve created.
Use fresh BAQ henna powder, sugar, water, and safe essential oil. Wait for that beautiful orange spot test, adjust your texture until it feels like silk, and freeze what you don’t use. Start with a small 25g batch. Once the paste feels right, make a larger batch with confidence.